
As the days get shorter and the air cools, I think back to my childhood. I remember the excitement of trick-or-treating, the joy of making cool costumes, and the Halloween decorations that lit up our neighborhood. It was more than just candy; it was a chance to be creative and connect with others.
Today, I want to share some fun DIY Halloween door decor ideas. With a little creativity and some basic materials, we can turn our front doors into magical displays. Let’s make our homes shine with homemade decorations that bring happiness to all who visit.
Key Takeaways
- Explore various DIY Halloween door decor ideas to enhance your home this season.
- Embrace the creativity of homemade Halloween decorations that reflect your style.
- Use simple materials to craft unique decorations that leave a lasting impression.
- Engage in enjoyable activities that foster connection with family and friends.
- Transform your front door into a standout feature that welcomes Halloween spirit.
Introduction to DIY Halloween Door Decor
Halloween is coming, and decorating excitement grows. DIY Halloween door decor lets me show off my creativity. It turns a simple door into a festive highlight.
Why DIY Halloween Decor?
Making my own decorations adds a personal touch. It lets me match designs to my style. DIY projects let me try new things, like spooky wreaths or fun garlands.
These ideas make my home more charming. They also bring joy and excitement to the neighborhood.
Benefits of Making Your Own Decorations
DIY Halloween door decor has many benefits. It can save money and be a fun activity for families and friends. Working together builds community and makes the season more enjoyable.
Creating special decorations not only beautifies my space. It also makes lasting memories.
Essential Supplies for Your DIY Projects
Starting your DIY Halloween door decor needs the right supplies. Whether you’re making homemade decorations or trying new projects, having the right tools is key. Here’s what you’ll need to make your crafting fun and productive.
Craft Supplies You’ll Need
First, gather a variety of craft supplies. These are the basics for any DIY project. They’ll help make your Halloween decor stand out:
- Wrapping paper (various colors and patterns)
- Card stock (white and black)
- Kraft wrapping paper for unique textures
- Ribbon (white sheer and red glitter for accents)
- Paper for creating bats, spider webs, and other spooky decorations
Tools for Effective Decoration
Next, you’ll need some basic tools. These will help you build and put together your creations:
- Scissors for cutting various materials
- Tape and glue for securing pieces together
- A circle cutter for precision shapes
- A black calligraphy pen for elegant lettering
- LED lights or flameless candles to add an atmospheric glow
Having these essentials ready makes DIY projects fun and efficient. For more tips and tricks, check out this resource.
Inspiring Themes for Halloween Door Decor
Turning your front door into a masterpiece starts with a theme that captures Halloween’s spirit. I look at different themes to make your door stand out and your home a Halloween wonderland. From classic images to new designs, there’s something for everyone, from little witches to ghost fans.
Classic Halloween Themes
Classic themes bring back Halloween’s old-time charm. Think pumpkins, bats, and witches. I use bright orange and black, along with fun details, to keep these symbols fresh. Here are some ideas:
- Hand-painted pumpkins with spooky faces
- Silhouettes of bats in flight
- Witch hats hung on door knockers
Modern Spooky Themes
Modern themes mix old ideas with new looks. Deep purples and metallics add a touch of style. I like adding ghost lights and whimsical touches for a modern feel. Here are some ideas:
- LED ghost lights that shimmer and flicker
- Chic wreaths combining black feathers and silver accents
- Minimalistic decor featuring abstract shapes
Family-Friendly Themes
These themes are perfect for families, with fun designs for kids and a touch of creativity. Soft colors and gentle images create a welcoming space. I use:
- Funny cartoon ghosts and friendly monsters
- Colorful crafts using foam and felt
- Interactive elements like a painted welcome mat with a playful character
Creating a Spooky Wreath
Making a spooky wreath is a fun way to show off your creativity. It adds a personal touch to your Halloween door. You can choose materials that make it eerie or festive, depending on your mood.
Choosing the Right Materials
First, pick materials that match your spooky theme. Use faux leaves, spider webs, small skulls, and tiny pumpkins. Eco-friendly choices like dried lavender, moss, and eucalyptus add a natural look. Mini pine cones bring a rustic feel.
Quality silk flowers and realistic faux eucalyptus make your wreath look real. This ensures your Halloween door decor is eye-catching.
Step-by-Step Wreath Assembly
Building your wreath is easy. Just follow these steps for a great look:
- Start with a strong base, like a grapevine or foam wreath form.
- Put on big elements like faux leaves or pine cones, spreading them out.
- Fill in the gaps with smaller decorations for balance and interest.
- Use hot glue to hold everything in place.
- Add a magical touch with fairy lights for a soft glow.
Unique Wreath Additions
To make your wreath stand out, add unique touches. Try metallic-painted dried leaves or fancy ribbons around the base. Geometric shapes or asymmetrical designs add a modern twist.
For a bold look, use oversized designs up to 30 inches. Find more creative ideas here.
Designing a Haunted Door Mat
Making a haunted door mat is a fun way to decorate your home for Halloween. It’s a great way to welcome trick-or-treaters and show off your creativity. This guide will help you pick the right base, use creative painting techniques, and add fun stencils to your mat.
Selecting the Perfect Base
Choosing the right base is key for your haunted door mat. Here are some good options:
- Coir Mats: Made from coconut husks, these mats are durable and absorbent, perfect for outdoor use.
- Fabric Mats: Fabric mats are versatile and can be customized with paint. They’re great for indoors.
- Rubber Mats: Rubber mats are ideal for adding a non-slip surface. They can handle harsh weather.
Creative Painting Techniques
After picking your base, think about using creative painting techniques. Here are some methods:
- Sponge Painting: Use a sponge to apply paint for a textured effect. This technique works well for creating shadows and depth.
- Brush Techniques: A simple paintbrush can create crisp lines, making messages or designs stand out clearly.
- Spray Painting: For bold colors and rapid application, spray painting offers an easy way to cover large areas.
Fun Stenciling Ideas
Stencils can add intriguing designs or phrases to your haunted door mat. Here are some stencil ideas:
- Spooky Faces: Create haunted expressions with ghostly stencils.
- Phrases: Use phrases like “Welcome if you Dare” or “Trick or Treat” to set a fun tone.
- Custom Designs: Create your stencils using cardboard or a cutting machine to personalize your creations.
Using Lights to Enhance Your Decor
Creating a magical atmosphere for outdoor Halloween decorations starts with the right lighting. The right lights can transform any space into a spellbinding or eerie place. This boosts the impact of your Halloween decor. By trying out different lights and where to place them, you can make your Halloween door ideas stand out.
Types of Lights Suitable for Outdoors
For outdoor Halloween decorations, various lights can make a big difference. Here are some great options:
- LED lights – Long-lasting, energy-efficient, and come in many shapes and colors.
- String lights – Simple to hang, great for outlining paths or draping over doorways.
- Solar-powered lanterns – Eco-friendly and perfect for lighting up pathways.
- Spooky spotlights – Cast focused beams that create eerie silhouettes.
Each type adds something special to your Halloween look. I really enjoy using spooky spotlights to create haunting shadows on the house or trees. It really adds to the spooky feel of my decor.
Positioning Lights for Maximum Impact
Placing lights in the right spots can really make your Halloween setup pop. Here are some tips:
- Put lights at different heights to add depth and interest.
- Use lights to highlight key areas, like a decorated door or a spooky graveyard.
- Try layering different lights to add depth to your scene.
- Use flickering lights to mimic candles and add realism.
For example, lighting up a pumpkin patch pathway with glowing lanterns and spotlights can create a welcoming yet spooky vibe. Adding reflected lights on nearby surfaces makes the scene even more captivating, drawing guests in.

Crafting a Ghostly Garland
Making a ghostly garland is a fun way to decorate your DIY Halloween door. It uses soft materials and fun shapes to make your Halloween decor pop. With just a few simple items and easy steps, you can create a garland that brings the Halloween spirit to life.
Materials Needed for a Garland
- White fabric (such as muslin or cotton)
- Twine or string for hanging
- Googly eyes
- Scissors
- Marker or fabric paint for details
Steps to Create Your Ghost Garland
- Cut fabric into rectangular shapes, about 12 inches wide and 18 inches long.
- Gather the top of each rectangle and tie it with twine, creating the ghost’s head.
- Glue or sew on googly eyes to give your ghosts character.
- Use a marker or fabric paint to draw spooky faces or add details to your ghosts.
- Space the ghost figures evenly along the twine, and hang your garland wherever you desire.
This ghostly garland will add a playful touch to your entryway or window. It captures the spooky spirit of Halloween. Enjoy making this fun part of your DIY Halloween door decor.
Transforming Your Door into a Monster
Adding fun elements to your spooky door decor makes Halloween more festive. Turning a regular door into a monster is a creative way to show off your skills in DIY projects. It lets you make your entryway unique and enjoy crafting.
Here’s what you need and how to do it step by step. Follow this guide to make your monster door stand out.
Materials for Monster Features
- Colorful craft paper
- Foam sheets in various colors
- Scissors and glue
- Paint for adding detail
- Googly eyes or craft eyes
- Pipe cleaners for added dimension
Step-by-Step Guide to Transformation
- Start by sketching your monster’s features. Think about the eyes, mouth, and ears.
- Cut out your shapes from the foam sheets and craft paper.
- Attach the googly eyes to the foam cutouts.
- Use scissors to create jagged teeth from white paper and attach them to the mouth.
- Affix the ears and other features to the door using strong glue.
- Paint details on the monster features to add character.
- Lastly, add whiskers with pipe cleaners.
This monster makeover not only boosts your Halloween decor but also offers a fun activity for families or friends. It’s a chance to get creative and have fun. Follow these steps, and your door will be a highlight of Halloween this year.
Incorporating Natural Elements
Adding natural elements to my Halloween door decor brings a unique touch. Using vibrant fall foliage and pumpkins makes my decor stand out. It’s perfect for those who love DIY projects and want to create something special.
Using Fall Foliage
Fall offers a wide range of colors, making it great for decorating. I collect leaves in red, orange, and yellow to make wreaths or garlands. These colorful elements frame my door and welcome guests.
Dried leaves also add to my decor. I use them in centerpieces or on handmade signs. They help create a warm and inviting atmosphere for Halloween.
Pumpkin Craft Ideas
Pumpkins are a key symbol of fall. Painting them with spooky designs or faces makes them eye-catching. They become conversation starters at my doorstep.
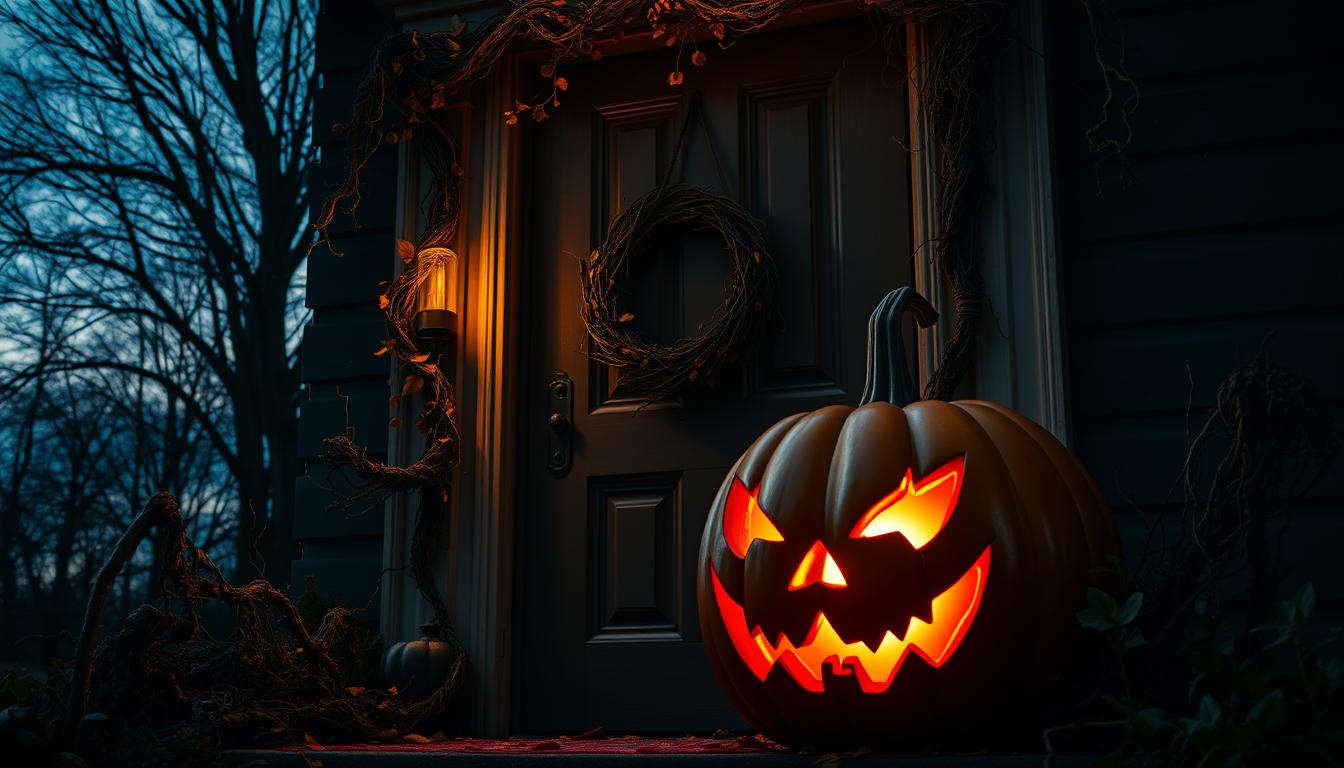
Carved pumpkins are another classic choice. They light up the evening, adding a magical glow. Making these decorations is fun and adds to the festive spirit of Halloween.

Adding Sound Effects to Your Decor
Adding sound to your Halloween decorations makes them even spookier. It creates an atmosphere that grabs everyone’s attention. The right sounds can make your outdoor decorations unforgettable.
Creating Spooky Sound Elements
To make spooky sounds, follow these steps:
- Choose a Theme: Pick sounds that fit your Halloween theme, like ghosts or haunted places.
- Create a Playlist: Make a list of spooky sounds or music. Think about creaking doors or creepy laughter.
- Layer Sounds: Mix different sounds to make your atmosphere even spookier.
Best Devices for Outdoor Use
There are great devices for outdoor Halloween decorations:
| Device | Features | Best Use |
|---|---|---|
| Wireless Speakers | Portable, Bluetooth connectivity | Playing spooky playlists from a distance |
| Motion-Activated Sound Boxes | Triggers by movement, various sounds | Scare guests as they come to your door |
| Solar-Powered Speakers | Eco-friendly, no wiring needed | Play music all evening |
Sound effects can make your Halloween decorations unforgettable. There are many devices to choose from. They add to the spooky atmosphere and make the experience more fun for everyone.
Seasonal Touches Beyond Halloween
After Halloween, many of us want to change our decor to fall. Adding seasonal touches keeps your Halloween decor alive. It also makes it easy to create autumn crafts.
Transitioning from Halloween to Fall Decor
Start by swapping out Halloween items for fall decor. Remove spooky decorations and add warm-toned pumpkins and colorful leaves. Natural elements like acorns or pinecones also work well.
Use plaid or burlap to add an autumn feel. Stick to neutral colors and natural textures. This makes the transition smooth and keeps some festive charm.
Tips for Easy Clean-Up After Halloween
Cleaning up after Halloween can be easy. Here’s how:
- Sort decorations into Halloween and fall categories.
- Use clear storage bins for easy organization.
- Craft with friends or family to make clean-up fun.
These tips help you transition smoothly. They keep your space organized and festive.
Conclusion: Personalize Your DIY Halloween Decor
As I wrap up this exploration of DIY Halloween door decor, it’s clear that adding your personal touch can make a big difference. Whether it’s a whimsical wreath or a frightful monster door, every element you create can show off your unique style and creativity. Adding your personality to your decorations not only adds to the spooky atmosphere but also makes the occasion more memorable for you and your guests.
Don’t hesitate to try out different colors, materials, and themes to make a display that feels distinctly yours. The beauty of creative Halloween door ideas is that they can be customized endlessly. You can use family photos or create specific themes, limited only by your imagination. Sharing your DIY accomplishments with friends, family, or on social platforms can inspire others and build a community around the delightful spirit of Halloween.
So grab your supplies, unleash your creativity, and let your Halloween spirit shine through your decor. I look forward to seeing the remarkable creations that you bring to life this Halloween season!