
Every year, I get asked the same question: “How do you make your home feel like autumn threw up in here?” My secret? A simple project that takes just 30 minutes but looks amazing. It’s not just another craft. It’s the gateway drug to seasonal coziness that’ll make your guests wonder how you did it.
I found this tradition during my first apartment Thanksgiving, when I was broke but wanted to host. You don’t need a lot of money to create warmth. The key is working with what you’ve got – like real gourds, dollar store pumpkins, or old decor. This project is easy, no matter if you’re good with glue guns or not.
What started as a way to impress my in-laws became my can’t-skip autumn ritual. It’s not about being perfect. It’s about the magic when candlelight shines on your table, making it look like a harvest dream. Want to be the neighbor everyone envies?
Key Takeaways
- Creates instant seasonal atmosphere for Thanksgiving or casual gatherings
- Works with both natural and artificial materials
- Budget-friendly (under $15 in most cases)
- Customizable for any skill level
- Doubles as conversation starter and photo backdrop
What You Need for Your Pumpkin Centerpiece
Starting a stunning autumn display begins with the right supplies. Whether you’re new to pumpkin crafts or experienced, quality materials are key. Let’s explore what you need to bring your seasonal gourd project to life.
Essential Tools and Materials
My toolkit has a few must-haves. Serrated kitchen knives are best for carving. Dollar store clay scrapers help shape details. I love Michaels’ hollow craft pumpkins for their light weight and reusability.
For floral arrangements, I choose Trader Joe’s sunflowers or mums. They last longer than most grocery store blooms.
- Floral foam blocks (Amazon’s Oasis brand)
- Hot glue gun for securing delicate elements
- Acrylic paints in matte finishes
- Twine or burlap ribbon for rustic accents
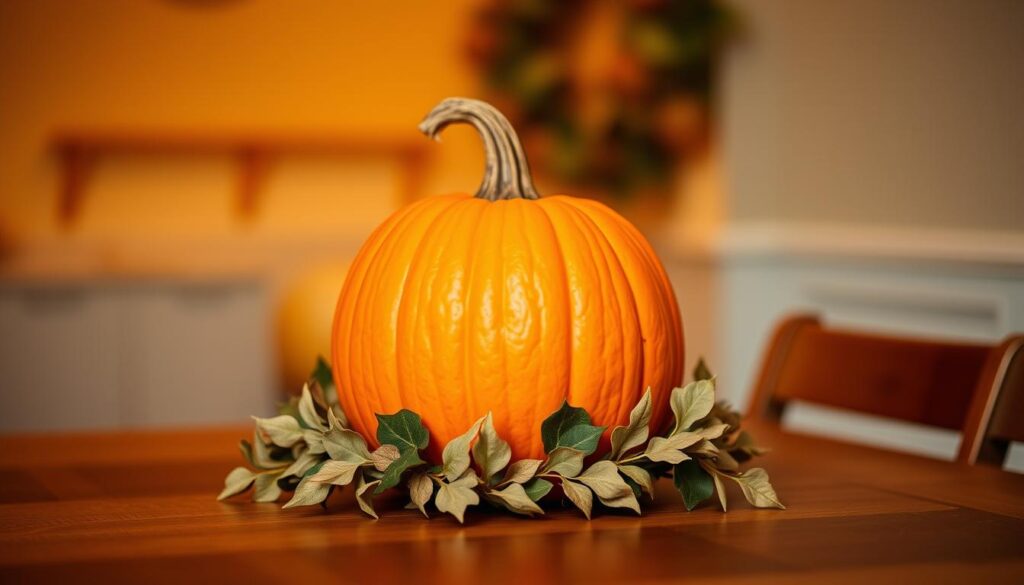
Choosing the Right Pumpkins
Not all pumpkins are the same. For carving, I prefer heirloom varieties like ‘Cinderella’. Their flat sides make designs stand out. Craft store faux pumpkins save time for multiple projects.
My trick? Mix real white ‘Lumina’ pumpkins with faux orange ones for texture contrast.
Color and Decor Options
Don’t stick to traditional orange! Last fall, I mixed teal-dyed globe thistle with burnt orange mums for a modern look. Try these combos:
- Metallic gold pumpkins + deep purple asters
- Chalk-painted mini gourds + crimson maple leaves
- Natural burlap-wrapped bases + white fairy lights
Remember texture. Dried wheat stalks or cinnamon sticks add warmth. I recently placed dollar store battery-operated tea lights inside Michaels pumpkins for a safe glow.
Step-by-Step Guide to Creating the Centerpiece
Let’s get started and turn those pumpkins into a stunning centerpiece! I’ll show you how to make a beginner-friendly pumpkin centerpiece that’s easy yet impressive. Get your tools ready, and let’s begin.
Preparing the Pumpkins
First, wash your pumpkins with mild soap to clean them. Use a serrated knife to carve a wide opening at the top. Scoop out the seeds with an ice cream scoop – you can even roast them later!
Pro tip: Soak floral foam in water for 15 minutes before using it. This helps keep flowers fresh. I learned this the hard way when my dahlias wilted in two hours last year!
Arranging and Positioning
Put your biggest pumpkin in the center as the base. Add smaller gourds around it for balance. When adding flowers, cut stems at angles and vary heights.
My Michaels haul included 4” foam discs that fit perfectly inside pumpkins. They help keep arrangements upright. Place shorter blooms around the edges to hide the foam.
Adding Finishing Touches
My secret weapon is eucalyptus. Use it to fill gaps between flowers. The silvery-green leaves add texture without overpowering the colors. Finish with mini pumpkins or pinecones around the base for a natural look.
Last step? Mist everything with water mixed with a drop of lemon juice. It keeps petals fresh and adds shine for photos!
Seasonal Themes for Your Centerpiece
I love how pumpkin centerpieces change with the seasons. You can easily switch them up to match September’s cool start, October’s spooky vibe, and November’s cozy warmth. You don’t have to start over each time.
Autumn Aesthetics
Early fall is all about earthy colors and natural textures. Pair white pumpkins with dried eucalyptus or muted orange accents for a soft look. A friend even turned her pumpkin arrangement into wedding centerpieces by adding gold-leaf stems. It shows that simple designs can be stunning.
For a rustic feel, place mini gourds next to painted pumpkins. Add pinecones or cinnamon sticks as the weather cools. This way, your centerpiece stays fresh through September and October.
Halloween Inspirations
October is the time for spooky vibes. Mix real pumpkins with fake elements like plastic spiders or black roses. They’re surprising but won’t spoil. Use LED tea lights inside carved gourds for a warm glow on Halloween nights.
Try metallic spray paint on mini pumpkins for a haunted look. Pair them with cobweb garlands for a fun yet elegant Halloween table. It keeps the autumn feel alive.
Thanksgiving Elegance
By November, I focus on harvest themes. Add wheat stalks and cranberry sprigs for movement. Velvet ribbon bows bring a touch of elegance. Last Thanksgiving, I placed battery-operated candles among the pumpkins for a lasting glow.
For big gatherings, group different pumpkin sizes down the table. Add persimmons or pomegranates as decorations. Guests can enjoy them as dessert!
Tips for Personalizing Your Centerpiece
What makes homemade table decorations unforgettable? It’s the personal touches that turn a simple pumpkin arrangement into a conversation starter. Let me show you how to infuse your style into every detail.
Family Heirlooms and Sentimental Items
Last fall, I nestled my grandmother’s crystal vase inside a hollowed-out pumpkin – it became an instant emotional anchor for my dining table. Here’s how to blend keepsakes safely:
- Carve a snug opening in your pumpkin’s side
- Line the cavity with waterproof foam or plastic wrap
- Secure fragile items with museum putty (removable and non-damaging)
Customizing Colors and Textures
My teal-and-green themed centerpiece started with these simple upgrades:
- Wrap mini pumpkins in velvet fabric scraps using hot glue
- Paint alternating stripes with matte acrylics for depth
- Scatter metallic acorns between pumpkins for contrast
Pro tip: Test color combos on paper first – burnt orange looks stunning against deep emerald!
Incorporating Candles or Lights
Battery-operated fairy lights transformed my DIY decor into a twilight showstopper. My no-mess method:
- Drill quarter-inch holes in pumpkin tops using a spade bit
- Thread light strands through, securing ends with clear tape
- Choose warm-white LEDs for that golden-hour glow
For candle lovers: Place tea lights in mason jars nestled among pumpkins – the glass reflects flickers beautifully without fire risks.
How to Care for Your Pumpkin Centerpiece
Creating your easy fall decor is just the first step. Keeping it fresh requires simple care. Whether you use real or fake pumpkins, these tips will help your centerpiece stay vibrant.
Maintaining Freshness and Vibrancy
For real pumpkins, a daily misting routine works wonders. Use cool water in a spray bottle and lightly spritz carved areas or painted surfaces every morning. This slows dehydration and keeps colors bold. If you’ve added fresh flowers, insert floral foam soaked in water mixed with 1 teaspoon of sugar – it acts like a mini hydration station!
Here’s my go-to freshness checklist:
- Store unused pumpkins in the fridge overnight
- Rotate display pieces every 2 days for even sun exposure
- Wipe surfaces with vinegar-water (1:3 ratio) to prevent early mold
Ensuring Longevity
Location matters more than you think! Keep your arrangement away from heat vents and direct sunlight. Rub petroleum jelly on cut edges to seal in moisture for a longer life. For faux pumpkins, dust weekly with a microfiber cloth to maintain their realistic sheen.
Pro tip: Create a maintenance calendar. Set phone reminders for:
- Mondays – Check for soft spots
- Thursdays – Refresh water in floral containers
- Sundays – Rotate decorative elements
Dealing with Spoilage
When my centerpiece suddenly grew fuzzy patches during Thanksgiving dinner, I learned to act fast. Scoop out affected areas with a spoon, then spray with equal parts water and lemon juice. For severe cases, carefully replace the spoiled pumpkin but keep the rest of the arrangement intact.
Real vs. faux maintenance comparison:
| Care Aspect | Real Pumpkins | Faux Pumpkins |
|---|---|---|
| Daily Care | Misting, moisture checks | Dusting |
| Lifespan | 5-14 days | Multiple seasons |
| Problem Signs | Soft spots, odor | Fading, cracks |
Remember: Even if a pumpkin starts to go, you can salvage decorative elements like dried corn or ribbon accents. With these strategies, your easy fall decor will stay photo-ready from September through November!
Beyond Pumpkins: Other Centerpiece Ideas
Pumpkins may get all the attention in autumn, but there are so many other ways to make stunning centerpieces. Let’s dive into three creative ideas that bring texture, color, and personality to your decor.

Using Gourds and Squash
Fall is the perfect time to find treasures at farmer’s markets for seasonal gourd projects. I enjoy mixing:
- Twisty bottle gourds for vertical interest
- Speckled acorn squash as natural bowls
- Mini pumpkins in contrasting colors
My top pick is an acorn squash filled with dried hydrangeas. The purple blooms stand out against the squash’s green. Just remember, avoid using wet veggies to avoid a mess.
Incorporating Seasonal Flowers
Fresh or dried flowers add warmth to autumn arrangements. Try combining:
- Rust-colored mums with wheat stalks
- Sunflowers nestled in leafy kale
- Dried lavender sprigs with miniature pumpkins
For arrangements that last, mix real and fake elements. Velvet pumpkins with pinecones offer cozy texture without wilting. They’re great for low-maintenance decor that stays beautiful all season.
Mixed Material Centerpieces
Combining different textures is where the magic happens. My favorite way to create:
- Start with a metal tray or wooden board base
- Add seasonal produce (gourds, apples, or pears)
- Layer in natural elements like birch logs or moss
- Top with metallic accents – copper candle holders work beautifully
Don’t be afraid to try new things! Even my failures, like glitter-covered squash, taught me a lot. The secret is finding the right balance between organic shapes and structured elements.
Addressing Common Questions and Concerns
Creating a pumpkin centerpiece can raise many questions, mainly for beginners. I’ve faced these questions during my 20-centerpiece wedding project. I’ll share solutions that mix creativity with practicality.
Why Choose a DIY Approach?
Cost savings is a big reason to go DIY. For my sister’s wedding, DIY centerpieces cost $22 each, compared to $75 for store-bought ones. It’s also about making something uniquely yours. One bride added heirlamily lace to her pumpkins, something no store could do.
| Option | Cost Per Piece | Customization Level |
|---|---|---|
| Store-Bought | $75+ | Limited |
| DIY | $15-$25 | Full Creative Control |
How Long Will the Centerpiece Last?
Real pumpkins last 7-10 days indoors. For longer displays:
- Spritz real pumpkins with 1:10 bleach/water solution weekly
- Use faux pumpkins as permanent base elements
- Swap fresh florals every 4-5 days
My hybrid centerpieces lasted three weeks. I replaced real parts as needed while keeping faux elements the same.
Can I Use Real and Faux Pumpkins Together?
Yes, you can! Mixing real and faux pumpkins adds depth. Place faux ceramic pumpkins next to real ones for a chic look. At the wedding, we used real mini-pumpkins around faux pillar candles. Guests couldn’t tell which was real until they touched them!
Budget-Friendly Tips for DIY Decor
You don’t need a big budget to make eye-catching centerpieces. My thrifty tricks keep costs low and creativity high. Whether you’re repurposing old items or hunting for deals, I’ll share my favorite strategies. These will help you craft stunning decor without overspending.

Cost-Effective Supplies
I always start at dollar stores for basics like faux leaves, ribbon, and small trays. Stores like Dollar Tree offer seasonal items at a fraction of boutique prices. For higher-quality materials, I wait for Hobby Lobby’s weekly 40% off sales on floral picks and candle holders.
| Store | Affordable Finds | Best Time to Shop |
|---|---|---|
| Dollar Tree | Vases, tea lights, ribbon | Year-round |
| Michaels | Floral stems, spray paint | With app coupons |
| Walmart | Mini pumpkins, burlap | Early October |
Reusing and Recycling Materials
Last year, I turned Halloween pumpkins into Thanksgiving decor by spray-painting them gold and adding lace trim. Thrift store vases become instant farmhouse chic with chalk paint—I’ve scored $2 finds that look straight out of a catalog.
- Repaint faded faux pumpkins with acrylics
- Use old mason jars as candle holders
- Turn broken picture frames into decorative trays
Finding Deals on Decorations
My secret? Hit Halloween clearance on November 1st for discounted pumpkins you can use through fall. Michaels’ “BOGO free” sales on floral arrangements are perfect for filling empty spaces in centerpieces. I also use the Honey browser extension to automatically apply coupon codes online.
“The best decor tells a story, not how much you spent.”
For last-minute touches, check Facebook Marketplace for lightly used seasonal items. Last week, I found a $15 bundle of silk sunflowers and birchwood logs—perfect for my autumn table!
Activities to Enjoy While Making Your Centerpiece
Turning pumpkin decorating into a social event makes it more fun. I host a “Pumpkins & Prosecco” gathering every year. Friends make centerpieces while enjoying rosemary crostini and caramel apple dips. It’s a mix of work and fun!
Inviting Friends or Family to Join
Group crafting is quicker and more enjoyable. Assign tasks like hollowing pumpkins or arranging flowers. Remember, keep sharp tools away from kids.
Hosting a Pumpkin Carving Party
Make your event special with a themed playlist and snacks. Here’s what I do:
- Music: Folk acoustic covers or spooky instrumental tracks
- Snacks: Mini pumpkin pies, spiced nuts, and a build-your-own cider bar
- Activity: Give out silly prizes for “Most Dramatic Carving” or “Best Mini Pumpkin Stack”
| Group Size | Snack Pairing | Drink Pairing | Activity Highlight |
|---|---|---|---|
| 2-4 | Cheese & charcuterie | Sparkling cider | Intimate carving session |
| 5-8 | Trader Joe’s dips | Prosecco or mocktails | Themed pumpkin contests |
| 9+ | Slow-cooker chili (try my recipe) | Seasonal sangria | Group photo with creations |
Creating a Cozy Atmosphere
Use cinnamon-scented candles, plush pillows, and fairy lights to set the mood. I cover tables with kraft paper for easy cleanup. This way, we avoid worrying about glitter spills.
Showcasing Your Finished Centerpiece
After you’ve worked hard on your pumpkin masterpiece, it’s time to show it off! Presentation is key, whether you want to add coziness to your home or impress on social media. Follow these tips to make your centerpiece stand out.

Best Places to Display It
Choose a spot where your pumpkin centerpiece can brighten up your day. Here are my favorite places:
- Dining tables: Elevates mealtime
- Fireplace mantels: Adds warmth to living areas
- Entryway consoles: Welcomes guests with charm
| Location | Benefits | Seasonal Impact |
|---|---|---|
| Kitchen Island | Visible during food prep | Pairs with autumn spices |
| Outdoor Patio Table | Weather-resistant display | Enhances fall gatherings |
| Home Office Desk | Inspires creativity | Softens work environment |
Taking Beautiful Photos
Natural light is essential for great photos. I take pictures near windows during golden hour. Use fallen leaves as backdrops. Try these angles:
- Bird’s-eye view for full arrangements
- Side shots for texture contrasts
- Close-ups for carving details
Pro tip: Add smaller pumpkins in the foreground for depth. A spritz of water adds dewdrop effects!
Sharing on Social Media
When you post, use hashtags like #PumpkinMagic or #DIYFallDecor. I love seeing your work – tag me @YourHandle for a chance to be featured! Here are some tips to boost engagement:
- Post carousel images for different angles
- Share short video clips with candle effects
- Collaborate with other creators for before/after posts
Seasonal Maintenance and Updates
Keeping your pumpkin centerpiece fresh and exciting all year is easy! Just a few tweaks can make it fit any holiday or season. Regular updates keep your decor fresh and exciting.
Revamping the Centerpiece for Holidays
When winter comes, I swap autumn elements for festive ones. Here’s how I do it:
- Layer Christmas ornaments around the base for instant holiday cheer
- Add pinecone clusters or faux snow for texture
- Wrap battery-operated fairy lights through dried vines
For Thanksgiving, I add mini cornucopias or metallic leaves. Keep the pumpkin as the main piece and change the smaller decorations.
Seasonal Cleaning Tips
Proper storage keeps pumpkins looking great between uses. My secret is a mix of:
- Cheesecloth wraps to prevent moisture buildup
- Cedar chips placed underneath to deter pests
- A cool, dark storage area (like a basement shelf)
I clean surfaces with a vinegar-water solution before decorating. It removes dust without harming painted designs.
Rotating Decor Elements
Swapping focal points keeps things interesting! I change these elements every quarter:
- Spring: Pastel ribbons and fresh daffodils
- Summer: Seashells and air plants
- Fall: Dried wheat stalks and cinnamon sticks
- Winter: Holly berries and silver-painted pinecones
Try keeping a “decor rotation bin” with seasonal accents. It makes updates easy and lets you reuse items all year!
Final Thoughts on Your DIY Pumpkin Centerpiece
Creating a pumpkin centerpiece taught me to love the journey as much as the end result. Every carved line, mismatched gourd, or uneven paint stroke adds character. What starts as a simple craft often becomes a cherished memory.
Encouragement to Experiment
Don’t be afraid to mix real pumpkins with fake ones from Michaels or Trader Joe’s. Try metallic spray paint for a modern look or burlap ribbons for a rustic feel. Mistakes? They’re just chances to try something new. A cracked pumpkin is perfect for drying eucalyptus stems.
Reflecting on Creativity and Joy
Arranging pumpkins is like life—messy, vibrant, and uniquely yours. This project isn’t about perfect photos. It’s about the joy of making something special for your Thanksgiving table or Halloween party.
Inviting New Ideas for Future Projects
Share your creations! Tag @SeasonalCraftHub on social media or email photos to our team. We’re building a gallery of reader-designed centerpieces for next year. Let’s create a community where creativity meets bold ideas.