
The smell of cookies and laughter fills my home in December. It’s a time of warmth, togetherness, and traditions. This year, I’m making a DIY advent calendar wall display. It’s a way to add a personal touch and celebrate the holiday season.
Making an advent calendar is more than counting down. It’s about creating excitement and bonding with family. With some materials and imagination, I’ll turn muslin bags and wood into a beautiful display. It will be a special part of my home, filled with treats and messages. If you want to celebrate in a unique way, follow my steps here.
Key Takeaways
- Crafting a DIY advent calendar adds a personal touch to holiday celebrations.
- This project serves as a reminder to appreciate the small joys leading to Christmas.
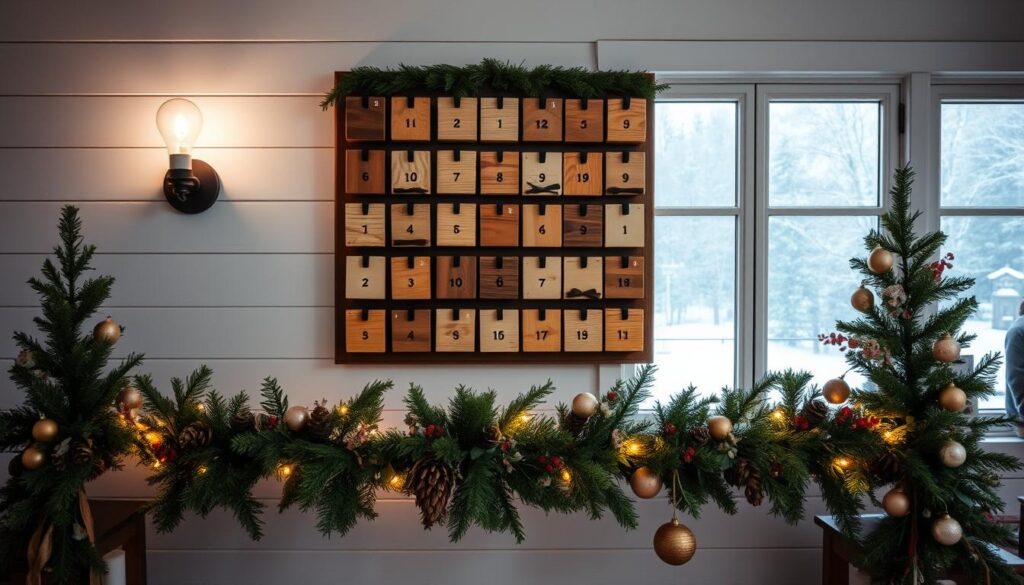
- Essential materials for the advent calendar include muslin bags and wood components.
- A unique design can enhance functionality while also serving as festive décor.
- Engaging in holiday crafts can foster creativity and connection with family.
Introduction to DIY Advent Calendar Wall Displays
Making a homemade advent calendar is a fun way to count down to Christmas. It’s filled with love and creativity. It not only brings daily surprises but also makes the holiday season more special. Learning about the history of advent calendars helps me appreciate my DIY project more.
The Meaning of Advent Calendars
Advent calendars started in Germany in the 19th century. They were a way for kids to count down to Christmas. Over time, they’ve become more elaborate, filled with treats and messages. They bring joy and anticipation to the holiday season.
Why Create a Wall Display?
Building a wall display for my advent calendar makes it more eye-catching. It lets me show off my style with colorful decorations and personal touches. Plus, it’s easy to change up each year, keeping things exciting.
Materials Needed for My Advent Calendar
To make a DIY advent calendar wall display, you’ll need various materials. This ensures a fun and rewarding crafting experience. Here’s a list of must-have craft supplies and some extra decorative items to make your display stand out.
Essential Craft Supplies
- Cardboard or sturdy paper as a base
- Scissors for cutting shapes
- Glue or tape for assembly
- Paint or markers for decoration
- Ruler for precise measurements
- Pencil for marking design
Optional Decorative Items
- Ribbons to add texture
- Stickers for fun embellishments
- Buttons or other small trinkets
- Wrap for pockets or boxes
- Twine for a rustic touch
Designing Your Calendar Layout
Creating a beautiful advent calendar wall display can make your DIY Christmas calendar a standout piece. Picking the perfect spot in your home is key. Choose a place that’s easy to see and reach, so your family can enjoy it every day.
Choosing the Right Location
Start by looking for areas in your home that need some holiday cheer. Some great spots include:
- Living Room: A spot where guests will see it often.
- Entryway: A place to welcome visitors with holiday cheer.
- Dining Area: Ideal for family gatherings during the season.
Each of these spots lets you add your personal touch and celebrate the holiday season.
Layout Ideas for Different Spaces
After picking the best spot for your advent calendar, think about how to arrange it. Here are some ideas for different spaces:
| Space Type | Layout Idea |
|---|---|
| Living Room | Use a large canvas or wreath as the base, adding pockets or small boxes. |
| Entryway | Make a door-hanging display with festive ribbons and numbered tags. |
| Dining Area | Use a table centerpiece that doubles as the calendar, with decorative jars. |
These ideas make designing your calendar layout fun. They ensure your holiday decor brings joy all season long.
Crafting the Calendar: Step-by-Step Instructions
Making a homemade advent calendar is fun and lets you add your own style. I’ll show you how to make a calendar that’s both useful and pretty. It’s a fun way to count down to the holidays. You’ll learn to make a base, add pockets or boxes, and decorate it with photos and messages.
Preparing the Base for Your Display
The first step is to make the base sturdy and look good. You can use a wooden board, canvas, or heavy cardstock. Cut it to size so it fits where you want it. A solid base is key for your holiday display.
Adding Fun Pocket or Box Elements
Now, let’s add the fun parts. I use small boxes or fabric pockets. You can buy them or make your own. I pick colors or patterns that match to keep it looking good.
Then, I stick them to the base with glue or tape. I arrange them in a way that looks nice.
Personalizing with Photos and Messages
To make it special, I add family photos and messages. I print small photos and write notes to put inside. This makes the calendar personal and fun for everyone.
Every day, opening a pocket brings a new memory and message. It adds to the excitement of the holiday season.
Creative Themes for Advent Calendars
Creating an advent calendar is a fun craft project that captures the holiday joy. Picking a theme makes it even more special. It lets you add your personal touch with festive colors and elements.
Seasonal Color Palettes
Choosing colors for my advent calendar is all about holiday magic. Red and green bring tradition, while gold and silver add elegance. I also like icy blues and warm neutrals for a calm feel.
It’s key to pick colors that match my home and style. This way, my calendar becomes a beloved part of my Christmas decor.
Incorporating Seasonal Elements
I enjoy adding seasonal touches to my advent calendar. Things like holly, snowflakes, or small ornaments add a festive vibe. Natural materials like pinecones or twigs give it an organic feel.
As I craft, balancing these elements makes my calendar joyful and cohesive. It fills my home with holiday cheer.
Filling My Advent Calendar: Gift Ideas
Filling an advent calendar is a fun part of the holiday season. It brings joy and surprise each day. I pick out small treats and notes that make me smile.
Choosing thoughtful items makes each day special. It turns the wait for the holiday into unforgettable moments.
Treats for Each Day
- Chocolate-covered almonds
- Mini scented candles
- Holiday-themed stickers
- Handmade cookies
- Personalized ornaments
Personalized Notes and Experiences
- Messages of love and appreciation
- Coupons for special experiences, like a movie night
- Shared memories written down
- A brief plan for a family outing
- Fun jokes or riddles to solve

Mounting Techniques for Wall Displays
Creating a DIY advent calendar wall display is more than just design. It’s about using the right mounting techniques to keep it up all holiday season. The method you choose affects how it looks and works. I’ll cover options like adhesives and hooks, focusing on stability and safety.
Using Adhesives and Hooks
Adhesives are simple and effective. Command strips are my top pick because they’re easy to remove and hold well. Traditional hooks add a decorative touch, but make sure they can handle the calendar’s weight.
Ensuring Stability and Safety
Stability is key when mounting your advent calendar. Check the wall type and test the calendar’s weight before hanging. This avoids any accidents. A secure display is safer and keeps the holiday spirit alive.
Maintaining Flexibility in My Calendar
Creating a flexible advent calendar is key for my family’s changing needs. Life can surprise us, and being able to change activities keeps everyone excited. I make sure my DIY calendar is personalized, so everyone finds their own joy.
Adjusting for Family Needs
I can change my advent calendar to fit different interests and schedules. On busy days, we might watch a favorite holiday movie or play a game. Other days, we might craft decorations or bake together. This way, everyone feels included and connected.
Reusing Calendar Components in Future Years
I focus on sustainability in my planning. I design parts that can be reused, saving money and reducing waste. With a little creativity, I can refresh the calendar each year. This approach boosts creativity and reduces environmental impact.

Inspiring Vintage and Modern Calendar Styles
Looking into calendar designs shows a mix of vintage calendar styles and modern advent calendars. Each style has its own charm. I find inspiration in old designs and make them fit today’s simple tastes.
Reinventing Traditional Designs
Vintage calendars bring back memories with their detailed art and deep colors. I mix these old-school elements with my own designs. I choose classic themes like fun drawings or lace to add a touch of tradition.
This mix of old and new makes my designs stand out. It brings a fresh twist to the traditional look.
Embracing Minimalism
Modern advent calendars, on the other hand, focus on being simple and useful. I use simple shapes and a few colors in my designs. This keeps the festive feel alive.
Using fewer, better materials makes my designs more appealing. This way, I keep advent calendars relevant and beautiful.
Troubleshooting Common Challenges
Creating a DIY advent calendar can have its ups and downs. I’ll tackle some common problems you might face. I aim to help you solve decoration and space issues with practical tips.
Addressing Decoration Issues
One big challenge is picking the right colors and materials. Start with a color scheme that matches your home. Using a few colors or materials can make your calendar look better. If things don’t match, try adding fabric or paper for texture.
Decorations falling off is another problem. Use strong adhesives like double-sided tape or hot glue. They stick better than regular craft glue.
Solutions for Space Constraints
If you don’t have much space, a wall-mounted advent calendar is a good idea. Use vertical space by hanging pockets or boxes at different heights. Magnetic strips can also help, letting you move things around easily.
Adding items that do more than one thing can also help. Use decorative trays or baskets for holiday treats and as decorations later. This way, you keep things tidy and festive.
| Challenge | Solution |
|---|---|
| Color coordination problems | Stick to a defined color palette |
| Decorations falling off | Use double-sided tape or hot glue |
| Limited wall space | Hang pockets at varying heights |
| Clutter from multiple decorations | Incorporate multifunctional storage elements |
Conclusion: My Advent Calendar Journey
Looking back, I feel a deep sense of joy and accomplishment. Making my own advent calendar has made my home feel more festive. It also let me show off my creativity.
Every pocket or box I made was filled with special surprises. These brought excitement to each day until Christmas. It showed me how important personal touches and traditions are during the holidays.
If you’re thinking about making your own advent calendar, I say go for it. It’s more than just making something pretty. It’s about making memories and sharing moments with your loved ones. It’s a chance to show off your creativity and make a calendar that fits your family’s spirit.
May your advent calendar bring you as much joy as mine has. Take on the challenge, enjoy the making of it, and let it become a special part of your holiday traditions. Here’s to a holiday season filled with creativity, passion, and shared experiences!