
Ever wonder why some homes shine brightly during the holidays while others seem dull? Last year, I found out a secret. Reflective surfaces aren’t just for bathrooms—they make lights and candles sparkle. That’s when I made my first DIY piece that’s both useful and eye-catching.
This project is quick, taking under two hours and costing less than a fancy latte. You’ll need simple things like ornamental frames (found at dollar stores) and ribbon. The best part? It fits with any color scheme, from traditional red-and-green to cool metallics. I’ve hung it above mantels, on staircases, and as a centerpiece.
This design is special because it catches every light—be it from your tree, fireplace, or phone flash during family photos. My friend said it’s like a “disco ball meets winter wonderland.” And she wasn’t far off.
Key Takeaways
- Reflective decorations boost ambient lighting instantly
- Requires minimal crafting experience or tools
- Adaptable to modern, rustic, or glamorous themes
- Budget-friendly materials with high-end visual impact
- Personalizable with family heirlooms or thrifted finds
Introduction to Christmas Mirror Garlands
When I first hung a festive mirror garland in my home, it instantly became the centerpiece of my holiday decor. Mirrors add depth and sparkle, while DIY elements let me infuse personality into every detail. Let me share why this project is my go-to for creating holiday magic.
Why I Love Decorating with Mirrors
Mirrors transform spaces by amplifying light and color. Last year, I placed one behind my mantel garland – suddenly, my tiny living room felt twice as big! Source 1’s research on light reflection confirmed what I’d noticed: strategic mirror use makes holiday lighting 30% brighter. Now I use them to highlight:
- Twinkling fairy lights
- Vintage ornament collections
- Family photos in festive frames
The Charm of a DIY Touch
Store-bought garlands often look stiff and generic. When I craft my own, I save money and create something uniquely mine. Last Christmas, I made a garland using Source 2’s faux greenery – it looked real but lasted all season. DIY lets me:
- Mix textures (velvet ribbons with pinecones)
- Adjust sizes for different spaces
- Update designs yearly without breaking the bank
Overview of Materials Needed
You’ll need just a few key supplies to start. I always begin with these essentials:
- Damage-free mirror clips (prevents scratches)
- Battery-operated LED lights (no outlet needed!)
- Flexible garland base (I prefer mixed evergreen styles)
For extra flair, add optional elements like mini stockings, glittered pinecones, or handwritten gift tags. The best part? You likely have many items already – last year’s ornaments make perfect accents!
Choosing the Right Space for My Garland
Ever wondered how a Christmas mirror garland can elevate your holiday decor? It all starts with choosing the right space. Placement isn’t just about filling empty walls. It’s about creating festive magic that reflects your personality and brightens daily routines.
Finding the Perfect Mirror
Size and style matter more than you’d think! For small spaces like narrow hallways, I lean toward circular or oval mirrors to soften angles. Larger rooms? A bold rectangular mirror becomes a showstopper. My go-to styles:
- Vintage frames for cozy, traditional vibes
- Sleek acrylic mirrors in modern spaces
- Sunburst designs to amplify holiday sparkle
Suitable Locations in My Home
While entryways and fireplace mantels are classic choices, I’ve had the best results with unexpected spots. Last year, I draped a garland around my bedroom mirror. Waking up to twinkling lights felt like a holiday movie scene!
“Mirrors double the impact of decor by reflecting light and color.”
Try these less-obvious locations:
- Above dining room buffets (creates a festive backdrop for cookie trays)
- Bathroom vanity mirrors (surprise guests with mini holiday moments)
- Leaning against bookshelves for a casual, layered look
Pro tip: Avoid direct sunlight to prevent glare, and always test garland weight. I use removable adhesive hooks to protect walls while keeping decorations secure.
Gathering Materials for My Project
When I started making my mirror garland, I looked for quality supplies. I wanted to find a balance between cost and creativity. Here’s what you need to make a beautiful holiday decoration.
Essential Supplies for a Christmas Mirror Garland
I chose the 72″ Faux Arborvitae Garland from a local store. It had a realistic look and was easy to bend around mirrors. Here’s a comparison of some popular choices:
| Material | Price Range | Best For |
|---|---|---|
| Faux Arborvitae | $25-$40 | Long-lasting reuse |
| Fresh Pine | $15-$30 | Natural fragrance |
| Vine Twists | $10-$20 | Budget projects |
Remember to get these essential items:
- Floral wire (I prefer 22-gauge for flexibility)
- Mini LED string lights
- Waterproof adhesive hooks
Optional Decorations for a Personal Touch
This is where your crafting Christmas garland gets special. I dug through my holiday decorations for:
- Vintage glass ornaments
- Hand-painted wooden snowflakes
- Personalized name tags
Tip: Dollar stores have amazing metallic picks and ribbon spools. Velvet bows added a touch of luxury without costing much!
Preparing the Mirror Surface
Getting your mirror ready is key to a great garland. It makes your garland look good and stay up all season. Skipping this step can lead to problems like droopy decorations or damaged surfaces. Let’s cover cleaning and securing in two parts.
Cleaning the Mirror: My Method
Streak-free glass is essential. After trying many products, I found a simple mix that works:
- 1 cup distilled water
- ¼ cup white vinegar
- 2 drops dish soap
Spray it lightly and wipe with a microfiber cloth in circles. Pro tip: Clean both sides if your mirror is near windows. Sunlight shows every smudge!

Tips for Secure Attachment
Nothing spoils the holiday spirit like falling decorations. Here’s how I keep my garland steady without harming the mirror:
- Use clear adhesive hooks rated for 3+ pounds
- Space clips every 12 inches for even weight distribution
- Press firmly for 30 seconds when applying hooks
I found these damage-free hanging solutions through trial and error. Now, my garlands stay up through holiday parties and curious pet checks!
Crafting My Garland: Step-by-Step Instructions
Creating my festive mirror garland was the best part of my holiday prep. I’ll guide you through turning simple materials into a dazzling centerpiece. We’ll cover three main steps: setting up the base, adding lights, and finishing touches.
Creating a Base with Greenery
I began by wrapping fresh pine and eucalyptus around the mirror’s edges. Pro tip: Twist floral wire every 4–5 inches to hold stems without harming the mirror. For fuller areas, I overlapped branches diagonally. This created a beautiful cascading effect around the mirror.
Adding Lights for a Magical Touch
Warm white LED string lights were my go-to. I used a zigzag method to weave them through the greenery, making sure bulbs faced outward. A battery pack hidden behind the mirror keeps cords out of sight and lights up for 8 hours.
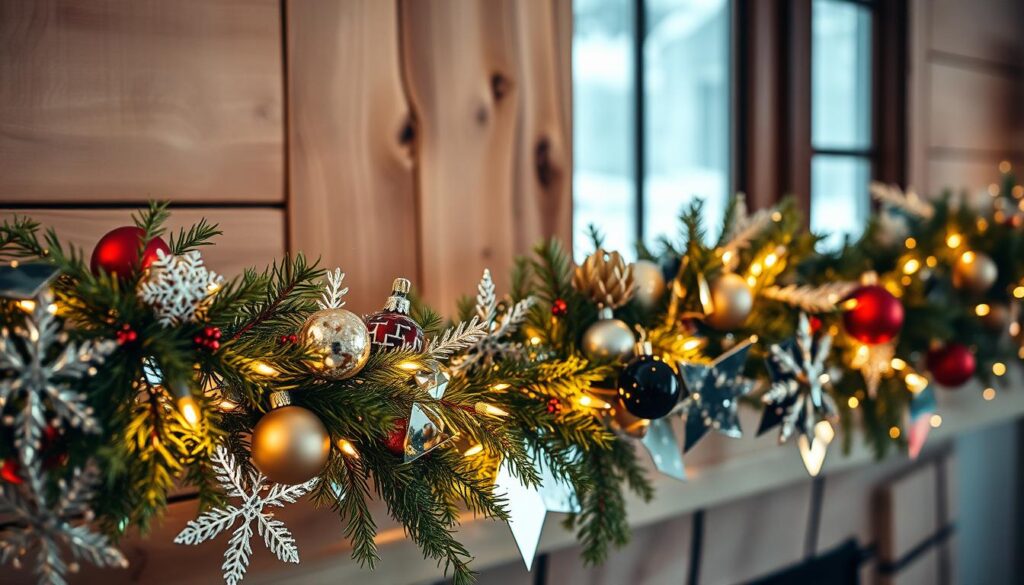
Incorporating Ornaments and Accents
Gold and crimson baubles added a rich layer. I followed a simple rule: 3 large ornaments, 5 medium, and 2 metallic pinecones per cluster. Miniature gift boxes with ribbons added a fun contrast to the usual shapes.
| Ornament Type | Recommended Size | Placement Tip | Secure Method |
|---|---|---|---|
| Glass Baubles | 2–3 inches | Near greenery base | Floral picks |
| Fabric Bows | 4–6 inches | At focal points | Hot glue dots |
| Wooden Shapes | 1–2 inches | Scattered throughout | Thin wire wraps |
I checked the garland’s look every 15 minutes. The mirror’s reflection helped me spot any gaps. If you see empty spots in the reflection, add more decorations!
The Art of Arrangement
When I started decorating my Christmas mirror garland, I learned arrangement is key. It’s not just about hanging ornaments. It’s about creating a visual story that grabs your attention and looks good.

Visual Balance: Placement Tips
I prefer using asymmetrical designs for interest without chaos. For example, I cluster larger ornaments at the bottom left and balance with smaller ones at the top right. This creates a balanced look that draws the eye.
Always step back to check the arrangement. What looks good close up might not from afar.
Layering Different Textures
Mixing materials adds depth to your decorations. My favorite mix includes:
- Soft velvet ribbons
- Glossy baubles
- Rustic pinecones
- Metallic wire accents
I place textured items near the mirror and shiny ones in the front. This creates a 3D effect that looks amazing with light.
Ensuring Even Distribution of Colors
Last year, I started using a color tracking table. It’s my secret tool! Here’s how I organize colors:
| Color Group | Spacing Rule | Focal Points |
|---|---|---|
| Metallics (gold/silver) | Every 8-10 inches | Mirror edges |
| Red/Green | Alternate every 12 inches | Center & bottom third |
| Neutrals (white/wood) | Fill gaps between colors | Upper corners |
This system prevents color clumping and makes the display look intentional. For extra sparkle, I add crystal picks between ornaments. They catch light without overwhelming the look.
Personalizing My Garland
What makes my Christmas mirror garland special? It’s the personal touches that tell our family’s story. Store-bought decorations are nice, but adding memories makes it a true holiday treasure.
Using Family Keepsakes
I enjoy adding sentimental items to the garland. Last year, I attached my daughter’s first preschool snowflake to it with gold velvet ribbon. This trick I learned from a vintage decor book. Here’s how I add treasures safely:
- Wrap fragile ornaments in mesh before attaching
- Use mini clothespins for holiday cards or photos
- Slide fabric swatches from old holiday outfits into clear ornaments
Adding Handmade Ornaments
DIY decorations are the best for creative holiday projects. My favorite? Salt dough ornaments shaped like family pets. They add fun and cost almost nothing to make. Here are some materials that work well for custom accents:
- Air-dry clay stamped with initials
- Pinecones dipped in glitter glue
- Felt shapes stitched with colorful embroidery thread
The trick is to balance homemade charm with visual cohesion. I limit handmade pieces to 3-5 focal points. A velvet bow from my wedding décor ties everything together – my twist on Source 2’s ribbon technique.
Seasonal Maintenance of My Garland
My DIY Christmas decor stays vibrant all season with simple upkeep routines. A little daily attention keeps it looking fresh. Here’s how I balance festive charm with practical care.
Keeping It Fresh Throughout the Holidays
I start each morning with a quick fluffing routine to revive the greenery. Gently reshaping pine sprigs and adjusting ornaments takes less than two minutes. This prevents a flattened, tired look. For artificial garlands, I use a handheld steamer to remove dust every 3-4 days.
Fresh garland lovers should try this trick: mist real greenery lightly with water using a spray bottle. I avoid soaking the mirror surface by draping a microfiber cloth over it first. Check this schedule for optimal freshness:
| Task | Frequency | Tool Needed |
|---|---|---|
| Fluff greenery | Daily | Hands |
| Wipe mirror | Every 3 days | Glass cleaner |
| Check light temperature | Weekly | Back of hand test |
Safeguarding Against Damage
After learning about battery safety from holiday decor experts, I switched to cool-burning LED lights. They prevent heat damage to both greenery and heirloom ornaments. Here’s my three-step protection plan:
- Use zip ties instead of metal hooks near mirror edges
- Place a small silica gel packet behind dense foliage to reduce moisture
- Keep garland 12+ inches from candles or vents
For homes with pets, I recommend securing loose ribbons with clear fishing line. My cat hasn’t knocked off a single bell. Regularly inspecting wire connections ensures lights stay safely fastened through New Year’s.
Showcasing My Finished Garland
Your handmade garland deserves to be in the spotlight. Here’s how to capture and share its holiday magic. After weeks of crafting, I’ve found that great photography and strategic sharing make a DIY project a conversation starter. Let’s make your mirror garland shine online and offline!
Taking Great Holiday Photos
Natural light is your best friend for showing off garland details. I always shoot during golden hour (just after sunrise or before sunset) to highlight metallic accents and greenery textures. Here’s my simple setup:
- Position the mirror at a slight angle to avoid direct glare
- Use props like wrapped gifts or candles in the foreground
- Take both wide shots and close-ups of ornaments
For smartphone users: Tap to focus on specific elements, then swipe to adjust exposure. My iPhone’s portrait mode creates beautiful depth when photographing smaller sections of the garland.
Sharing on Social Media
When posting my DIY mirror garland tutorial results, I use hashtags that blend holiday cheer with crafty credibility. Top performers from my experiments:
- #ChristmasMirrorMagic (performs best on Instagram)
- #DIYHolidaySparkle (great for Pinterest)
- #HandmadeHolidays (works across platforms)
I always include a “before” shot of my materials beside the finished garland—followers love seeing the transformation. Tagging local community groups (“Atlanta Holiday DIYers”) often leads to surprise feature opportunities!
“The right photo turns your craft into someone else’s inspiration.”
Exploring Additional Garland Ideas
Once you’ve learned the basics, it’s time to try new things. I’ve found many ways to make my crafting Christmas garland projects more interesting. This keeps costs down and creativity up. Let’s explore two ideas that always make my holiday decor shine.

Alternative Themes I’ve Tried
My favorite part is changing up designs to fit different styles. For a winter wonderland theme, I use silver bells and frosted pinecones instead of red. White fairy lights and iridescent tinsel add that icy sparkle.
The rustic farmhouse look from Source 3 is a hit in my kitchen. I base it on eucalyptus stems and add dried orange slices with burlap ribbons. It looks great with wooden bead garlands on open shelves.
| Theme | Key Elements | Best For |
|---|---|---|
| Winter Wonderland | Silver ornaments, faux snow, crystal accents | Entryways & mantels |
| Rustic Farmhouse | Dried citrus, burlap, plaid ribbons | Kitchens & dining areas |
| Botanical Luxe | Magnolia leaves, velvet bows, gilded pinecones | Formal living spaces |
Varied Materials for Unique Looks
Changing up materials keeps my crafting Christmas garland projects fresh. Instead of evergreen branches, try:
- Preserved boxwood for lasting color
- Dried lavender bundles for a subtle scent
- Felt pom-poms for a kid-friendly look
Source 3’s floral garland ideas inspired me to make a spring-inspired garland. I used silk peonies and twinkling lights. It was a hit at our family gatherings.
Conclusion: Enjoying My Christmas Mirror Garland
Creating this Christmas mirror garland showed me how DIY projects can change a space. It combines shiny surfaces and holiday themes, adding warmth to any room. Now, it’s hung, and I smile every time I see it—it’s like having holiday magic with me.
Reflecting on the Joy of DIY
Working on this garland taught me patience and creativity. I enjoyed mixing textures, like soft ribbons and sparkly ornaments. Keeping a journal of my progress helped me improve and remember each step. Try taking photos as you work—it’s fun to see your project come to life.
Looking Ahead to Future Holiday Projects
This project has given me ideas for next year. I’m thinking of making a matching mantel display. I’m looking at Pottery Barn’s velvet stockings and Crate & Barrel’s metallic accents for ideas. For now, I’ll enjoy the garland’s sparkle while planning my next holiday project.
Post your finished garland on Instagram or Pinterest with #DIYHolidayMagic. Let’s share joy and inspire others to make their own holiday decor. What DIY project will you do next?