
Standing in my living room, I looked at the bare walls and felt a strong urge for change. Sometimes, a small change can make a big difference in our spaces. That’s when I found the art of mastering 3D wall panels.
This guide is for anyone wanting to install and style 3D wall panels. I’ll share practical tips and stylish ideas. Whether you love DIY or need professional help, this guide will help you. By the end, I hope you’ll feel ready to turn your walls into stunning highlights of your home.
Key Takeaways
- Understanding the essence of 3D wall panels and their benefits.
- Choosing the right materials for your installation project.
- Learning step-by-step installation techniques for success.
- Exploring styling options to maximize your decor’s impact.
- Maintenance tips to keep your wall panels looking fresh.
- Real-life examples of transformed spaces through 3D panels.
Introduction to 3D Wall Panels
3D wall panels are changing the game in interior design. They add depth and texture to any space. Made from different materials, they come in many styles, fitting any decor.
What Are 3D Wall Panels?
3D wall panels are designed to make a statement. They’re made from wood, PVC, or gypsum. These panels can transform a room’s look and hide wall imperfections.
Benefits of 3D Wall Panels
3D wall panels do more than look good. They also improve sound and are easy to put up. Their design lets me express my style easily. Plus, they’re light, making installation a breeze.
Where Can I Use Them?
3D wall panels work well in many places. They’re great in living rooms as a centerpiece. They also modernize offices and stores. Their versatility makes them perfect for any space looking for a style boost.
Choosing the Right 3D Wall Panel Material
When starting a project with 3D wall panels, knowing the materials is key. Each material has its own look and function. By looking at the pros and cons, I can pick the best for my project.
Common Materials for 3D Panels
Wood, MDF, PVC, and acrylic are top picks for 3D wall panels. Wood adds a cozy feel. MDF is light but strong, perfect for many uses.
Pros and Cons of Each Material
Durability and upkeep are big factors when choosing materials. Wooden panels need care to stay looking good. PVC and MDF are durable and come in many styles, great for different places. Acrylic is perfect for wet areas like bathrooms and kitchens.
How to Decide Which Material Fits Your Needs
Deciding on materials means looking at durability, moisture resistance, and looks. My style and the space’s purpose help me choose. For more info, 3D wall panel materials are very helpful. They help me understand each material better, making my choice easier.
Preparing the Installation Area
Before I start installing wall panels, I make sure the area is ready. This careful preparation is key to a perfect finish. I focus on three main steps: measuring walls, ensuring a level surface, and cleaning and priming the walls.
Measuring Your Walls
Measuring walls for wall panels needs to be precise for a perfect fit. I use a tape measure to get accurate measurements. Here are some tips for measuring correctly:
- Measure the height and width of each wall.
- Record the measurements in a notebook for easy reference.
- Consider any obstacles, like light switches or outlets, that may affect panel placement.
Ensuring a Level Surface
A level surface is vital for wall panel installation. I use a level tool to check for uneven areas. If I find any, I make adjustments to ensure a smooth installation.
Cleaning and Priming the Walls
Cleaning walls before installation is a must. I start by dusting and washing the surfaces with mild soap and water. After drying, I apply a primer to help the panels stick securely.
Tools and Supplies Needed for Installation
Starting a wall panel installation project? You’ll need the right tools and supplies. The right preparation makes the job easier and more successful. I’ll cover the tools, adhesives, and supplies you’ll need for a smooth installation.
Essential Tools for Installing Wall Panels
- Level: Ensures that panels are installed evenly.
- Adhesive Gun: Necessary for applying adhesive accurately.
- Saw: A utility saw or jig saw will help in trimming panels to fit.
- Tape Measure: Crucial for precise measurements.
- Caulking Gun: Ideal for applying sealants to fill gaps.
Recommended Adhesives and Fasteners
Choosing the right adhesives is key. The best adhesives for wall panels include:
- Construction Adhesive: Suitable for most wall panels due to its strong bond.
- Double-Sided Tape: Offers a quick solution for lighter panels.
For more secure installations, using fasteners like screws and wall anchors can provide added stability.
Additional Supplies for a Smooth Installation
There are more supplies that can make the installation smoother. Consider these:
- Protective Gear: Safety glasses and gloves to protect during the installation.
- Drop Cloths: To keep the working area clean and minimize mess.
- Spackle and Sandpaper: Useful for finishing touches on wall imperfections.
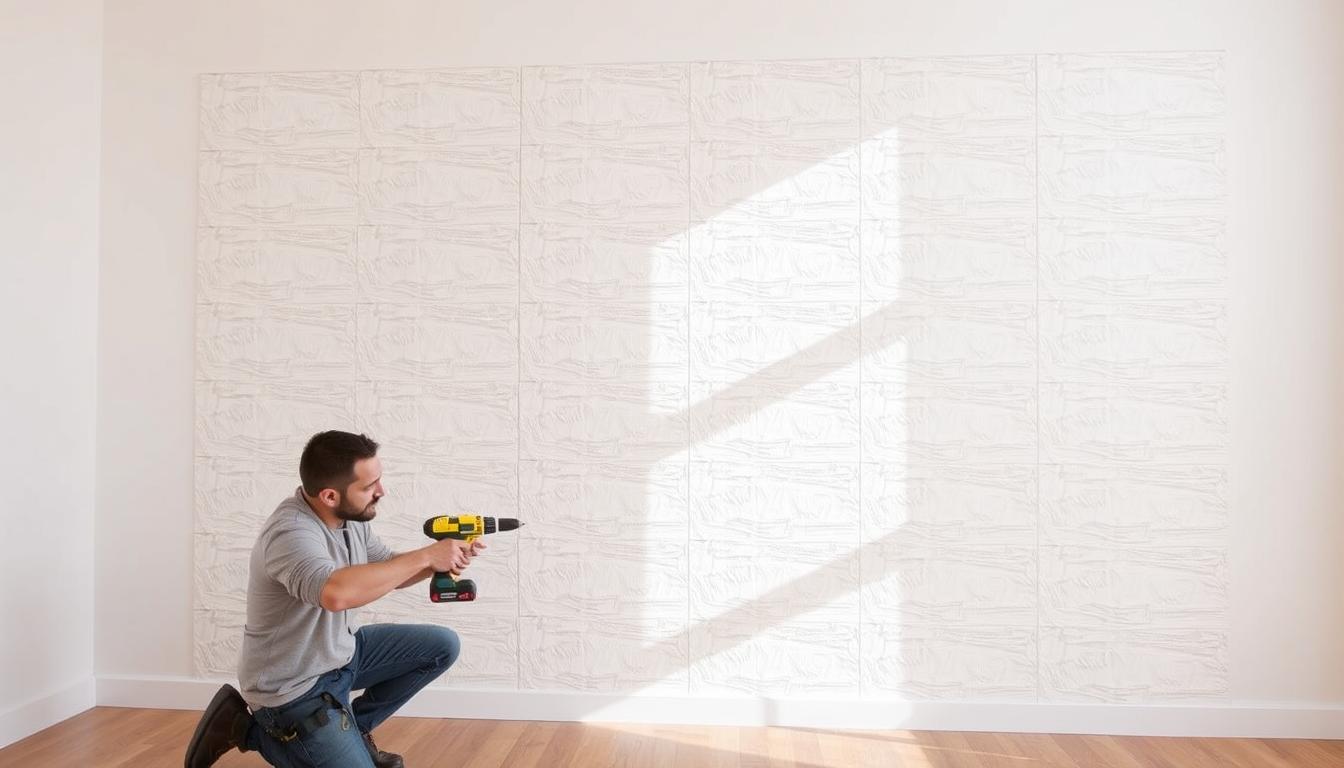
Installation Process for 3D Wall Panels
Installing 3D wall panels right is key. You need to know the step-by-step wall panel installation process well. This ensures a clean finish and boosts your space’s look. I’ll guide you through, share tips for aligning panels, and point out common mistakes to dodge.
Step-by-Step Guide to Installation
Begin with the basics for a smooth installation:
- Measure the wall to figure out how many panels you’ll need.
- Get the wall ready by making sure it’s clean, dry, and level.
- Spread adhesive evenly on the back of each panel.
- Place the first panel and use a level to keep it straight.
- Keep adding panels, using spacers for even gaps.
- Press the panels firmly and let the adhesive dry as the maker says.
Tips for Aligning Panels Correctly
Getting panels aligned right is key for a smooth look. Here are some tips for 3D wall panel alignment to help:
- Use a laser level for straight lines.
- Check alignment with each panel to avoid mistakes.
- Number panels before installing to keep your pattern right.
Common Mistakes to Avoid
Knowing wall panel installation mistakes to avoid saves time and effort. Watch out for these common errors:
- Not letting adhesive dry long enough can cause panels to come loose.
- Getting the panel count wrong can delay your project.
- Not checking the wall surface first can lead to uneven panels.
| Mistake | Consequence |
|---|---|
| No curing time for adhesive | Pannels may fall off or misalign |
| Incorrect measurements | Wasted materials and unaligned panels |
| Poor wall preparation | Uneven surfaces leading to poor installation |
Styling Options for 3D Wall Panels
After installing the panels, it’s time to style them for a stunning finish. The color you choose greatly affects the room’s mood. Whether you want calm or vibrant, picking the right colors is key.
Choosing a Color Scheme
Think about your current decor and the mood you want. Neutral colors like white, gray, and beige are great for calm spaces. Bold colors make a bold statement. A good color scheme ties the whole room together.
Integrating Lighting with Wall Panels
Lighting can make your 3D panels pop. LED strips can show off the panels’ texture and shape. Spotlights add depth and interest. Where you place the lights can really change how the panels look.
Accessories to Enhance the Look
Adding accessories like art, shelves, or decorations can make your panels stand out. Pick art that matches the panel colors or use shelves for personal items. These touches can show off your style and make the room look cohesive.

Incorporating 3D Wall Panels into Home Decor
Exploring wall panel design ideas opens up exciting possibilities for transforming various spaces in my home. By incorporating wall panels in home decor, I can create visually stunning environments tailored for specific activities and moods. This section highlights effective ways to use 3D wall panels to enhance my living room, office, and entryway.
Living Room Concepts with Wall Panels
In my living room, wall panels can act as a stunning focal point. I can choose bold textures and colors that resonate with my style. Utilizing living room wall panel concepts, I find that a single statement wall adorned with panels draws attention, while the remaining walls remain minimalist to avoid visual clutter.
Creating a Dynamic Office Space
In an office setting, the right 3D wall panels can foster creativity and enhance productivity. By selecting calming colors and unique designs, I can inspire a stimulating work environment. Incorporating wall panels in home decor not only adds depth but can also reduce noise, creating a more serene atmosphere for focused tasks.
Designing an Inviting Entryway
My entryway deserves to make a strong first impression. By incorporating wall panels, I create a welcoming space that showcases my personality. Varying heights of panels or combining different materials can give the entryway a dynamic look, impressing guests as they step into my home.
Maintenance and Care of 3D Wall Panels
Keeping 3D wall panels looking good and lasting long is key. I’ll share cleaning methods for various materials, how to spot damage early, and long-term care tips.
Cleaning Techniques for Different Materials
Each material needs its own cleaning method. For example:
- PVC Panels: Clean with a damp cloth and mild soap. Stay away from harsh cleaners that can scratch.
- Wood Panels: Dusting is usually enough. For deeper cleaning, use a wood-safe cleaner, following the grain.
- Fabric Panels: Vacuum with an upholstery attachment often. Spot clean stains with a fabric-safe solution.
Regular Inspection Tips
Regular checks are vital for maintaining wall panels. I suggest inspecting them every few months for:
- Loose edges or corners
- Discoloration or fading
- Surface damage like scratches or dents
Catching these problems early helps fix them quickly. This keeps your panels looking and working great.
Long-term Care Recommendations
To keep your panels beautiful for a long time, follow these tips:
- Use coasters and mats under furniture to avoid scratches and dings.
- Keep the humidity in your space right, which is important for wood panels.
- Apply protective coatings or sealants to stop moisture damage and stains.
By following these steps, you can make sure your decorative wall panels stay in top shape.

Transforming Your Space with 3D Wall Panels
3D wall panels are a fun way to update your home. They show how design can change a space a lot. Using these panels in different areas can make rooms look bigger, deeper, and more beautiful.
Before and After Case Studies
Looking at before and after photos of wall panel installations shows big changes. A simple living room can turn into a stunning place with textured 3D panels. The change is often dramatic, making the room feel bigger and more welcoming.
How 3D Panels Change Perception of Space
Adding 3D panels changes how we see a room. For example, vertical panels in a small room can make it seem taller. Deep textures add warmth and depth. This makes visitors feel more at home.
Creating Focal Points in Your Home
These panels help create eye-catching spots in your home. They can be an accent wall in the bedroom or a stylish backdrop in the hallway. They make certain areas stand out, changing the feel of each room.
| Room Type | Before Installation | After Installation |
|---|---|---|
| Living Room | Plain, flat walls | Dynamic texture and depth with 3D panels |
| Home Office | Dull, uninspired space | Invigorated atmosphere with eye-catching features |
| Bedroom | Neutral colors without character | Inviting focal wall that enhances relaxation |
Conclusion and Final Thoughts
As we finish this guide on 3D wall panels, let’s focus on the important parts. Installation, styling, and maintenance are key. Choosing the right materials and following a detailed installation guide can change your space a lot.
3D panels are versatile and can fit into many settings. They make your room look better and work better too.
Now is a great time to start your DIY project. You can make a beautiful focal point or just improve your decor. 3D wall panels can make any room look new and special, with your own personal touch.
If you’re looking for inspiration, check out Pinterest and home improvement blogs. They have lots of ideas and designs. These platforms can spark your creativity and connect you with others who love DIY projects. Let your imagination run wild with 3D wall panels!