
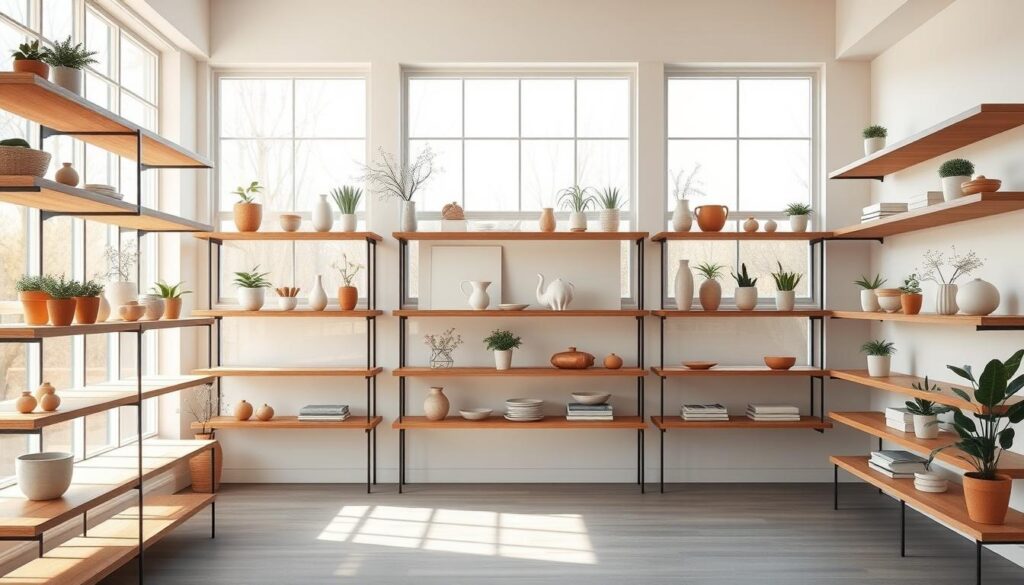
Imagine a kitchen that feels both airy and organized without losing its style. This is what I’ve been thinking about while redesigning spaces. Open shelving is the key, making your kitchen a living display that brings freshness to your home.
Designing with Ventura’s functional style in mind, I found a way to mix practicality with personality. Your shelves can change with the seasons. Swap out heavy winter items for light spring dishes or add potted herbs as decor. This way, your shelves stay fresh all year.
Vertical space is your best friend. By placing items at different heights, you add visual interest and keep things within reach. It’s like curating a museum where every item tells a story. Seeing your favorite mugs and that special bowl from your last trip on display is incredibly satisfying.
Key Takeaways
- Open shelving blends storage efficiency with decorative flexibility
- Seasonal updates refresh your space without major renovations
- Vertical arrangements maximize underutilized wall areas
- Frequently used items stay accessible yet aesthetically organized
- Combining textures and heights creates dynamic visual interest
Embracing the Seasonal Shift with Open Shelving
Spring is more than just flowers blooming. It’s the perfect time to rethink our home spaces. After cozy winter months, open shelving brings a fresh feel. It’s like changing from a heavy sweater to a light linen shirt, making your kitchen or living area feel lighter and more focused.
Why Spring is the Perfect Time for a Refresh
Redecorating after winter used to be daunting. But seasonal rotations changed everything. Open shelves let you swap dark bowls for light ones or glass jars that reflect sunlight. Last March, I cleared my cabinets and put my spices and utensils on shelves near the stove. It made cooking easier, and my kitchen organization tips became a hit with visitors.
The Benefits of Open Shelving in Spring
Open shelves do more than look good. They help you organize better. By curating what’s visible, you naturally cut down on clutter. I keep my baking sheets and bowls near the oven, a tip from designer Maria Ventura. She says to “zone shelves by activity, not just decor.”
Here’s why it works:
- Airy displays: Arrange items in odd numbers, leaving 30% empty space to avoid clutter
- Dust management: Clean surfaces weekly with a microfiber cloth—it only takes 10 minutes
- Budget-friendly updates: Rotate what you already have instead of buying new (my top affordable shelving solution)
This spring, try adding a trailing pothos and your prettiest olive oil bottle to one shelf. You’ll be surprised at how small changes can make your space feel new without a big remodel.
Color Palettes to Inspire Your Spring Shelving
Spring brings new chances to refresh your shelves with color. You might love soft colors or bright ones. Your choice sets the tone for your space. Let’s look at two popular ways that fit well with minimalist home decor and rustic shelving inspiration.
Embracing Pastels for a Soft Look
Pastels like blush pink, mint green, and yellow can make shelves calm. Joanna Gaines uses these colors with raw wood for a cozy yet stylish look. Try these:
- Dusty blue ceramic vases with linen books
- Pale peach bud vases and woven rattan trays
- Sage green storage boxes with white stoneware
LTK creators use floral arrangements in vintage milk glass. They place them against neutral backgrounds. This adds interest without making spaces feel crowded.
Bold and Bright: Making a Statement
For those who want energy, 2025 Pinterest trends suggest bold colors like tangerine, emerald, and cobalt. My favorite trick is to pair bold pieces with natural elements:
- Glossy coral bowls on reclaimed wood shelves
- Navy patterned plates with terracotta planters
- Mustard yellow books with trailing ivy
For a softer base, mix bold colors with Scandi-inspired neutrals. Think charcoal-gray shelves with lilac or seafoam green.
Integrating Plants into Your Shelving Design
Spring is the best time to mix plants with your open shelving. Whether you’re new to plants or have lots of experience, adding them brings a fresh, natural feel. This look matches well with rustic shelving inspiration. I’ve learned a lot, including from my mistakes, to help you avoid them.
Choosing the Right Houseplants for Your Space
Not all plants do well on shelves, if your area doesn’t get much sunlight. I killed three ferns (they need way more humidity than I thought). So, I picked plants that do well in low light, like:
- Snake plants: They’re almost impossible to kill and great for high shelves.
- Pothos: It grows well around creative storage solutions like woven baskets.
- ZZ plants: They do well in corners with little care.
For small areas, consider mounted stations for plants. I used test tubes and small terracotta pots for cuttings. They add life without making things messy. Just turn them every week for even growth!
Seasonal Flower Arrangements for Open Shelving
Fresh flowers say spring! I mix store-bought tulips with wild branches for a cheap but striking look. Try these ideas:
- Daffodils in different bud vases
- Peony stems with eucalyptus in rattan holders
- Wildflower bunches in old mason jars
Tip: Use floral foam in decorative bowls for small, stable arrangements. Change the water every two days and trim stems at an angle. When flowers wilt, use dried hydrangeas or wheat stalks to keep your rustic shelving inspiration going through summer.
Functional Decorative Items for Your Shelves
Spring brings a chance to mix practicality with beauty on open shelves. This season, I’m looking for items that solve storage problems and add charm. Think of woven baskets as linen organizers or colorful jars for kitchen staples.
Mix and Match: Combining Utility and Style
I enjoy making vignettes where items serve more than one purpose. A thrifted pitcher holds utensils, while cookbooks frame a succulent planter. My tip? Follow designer Margot Ventura’s advice to let objects tell your story.
- Use dollar store trays to corral spice jars
- Layer tea towels as textural backdrops
- Stack oven mitts like miniature artwork
Using Baskets for Organized Beauty
Nothing says spring refresh like crisp linens in airy baskets. I transformed basic dollar store finds with scrap fabric:
- Line basket interiors with patterned cotton
- Secure edges with iron-on adhesive
- Add leather pulls for rustic contrast
This DIY shelving project took 20 minutes and made my bathroom shelves look great. For deeper shelves, nest three baskets in sizes that graduate. It’s perfect for towels and adds visual rhythm.
Creating Depth with Layered Shelving
Layered shelving is more than just stacking things. It’s about telling a story with depth and dimension. When I design open shelves, I aim to create visual layers that draw the eye. I also make sure to use every inch of space.
Tips for Layering Decor to Maximize Space
My secret? Anchor item + vertical element + organic shape. Begin with a big piece like a large ceramic bowl or a woven tray. Next, add height with cookbooks or tall vases. Finish with something unique, like a twisted driftwood sculpture or an uneven plant pot.
I once styled 12″ deep shelves for a client using angled cutting boards as anchors. We leaned them against the wall and layered small herb planters in front. This created depth without losing functionality. Remember, group items in odd numbers for natural balance.
Balancing Heights for Visual Appeal
Varying heights makes shelves look interesting, not flat. Try this mix:
- Tall: 14″ vase with pampas grass
- Medium: Stack of 3-4 horizontal cookbooks
- Low: Mini succulent in a concrete pot
For modern kitchen design, pair sleek canisters with trailing plants. The contrast between sharp lines and soft foliage adds warmth. Don’t forget about lighting! A slim LED strip under the top shelf highlights your layers while keeping things airy.
One of my favorite storage solutions? Use shallow baskets as “frames” for smaller items. Place a basket sideways, fill it with citrus fruits or napkin rings, and you’ve got a styled vignette that hides clutter beneath.
Incorporating Seasonal Tableware
Spring is here, and it’s time to refresh your dishes and cookbooks. Open shelves can show off spring’s spirit with a mix of practical and seasonal items. Let’s see how to make your tableware and cookbooks look fresh and full of life.
Choosing Dinnerware That Compliments Spring
Don’t worry about matching sets. Curated mismatches add warmth and interest. Try mixing pastel salad plates with floral bowls or earthy mugs. Stick to soft colors like greens, yellows, or blues for spring.

Texture matters too. Use woven chargers or copper mugs to add depth. I swap mug collections with the seasons. Light ceramics for spring, heavier ones for fall. It keeps your shelves looking new without changing everything.
Displaying Seasonal Cookbooks in Style
Spring recipe books deserve a special spot. Show them off on stands or vintage bookends. Highlight dishes like herb salads or berry desserts. Angle the books to show off colorful spines or photos.
Make vignettes by layering:
- A stack of linen napkins under the book
- A small vase of fresh herbs as a page marker
- A matching serving bowl displayed nearby
This turns rustic shelving inspiration into stories. I add handwritten recipe cards for a fun touch. It lets guests engage with the display while keeping things organized.
DIY Open Shelving Ideas for Spring
Spring is the perfect time for DIY projects, and open shelving is a great way to get creative. You can use old materials or build something new. These DIY shelving projects help you create storage that’s uniquely yours. Let’s explore ways to update your space without spending a lot.
Simple Upcycling Projects for a Fresh Look
Got an old shutter? Turn it into a rustic shelf! I recently made a shelf from salvaged shutters. I sanded off the old paint and applied a chalky white finish. Then, I lightly distressed the edges with sandpaper.
Attach sturdy L-brackets (sprayed matte black) for contrast. And that’s it – instant farmhouse charm!
Safety first: Always check the weight limits for wall anchors. Use metal brackets for heavy items like dishes or books. Designer Emily Ventura suggests mixing finishes for a modern-industrial look.
Customizing Shelves to Fit Your Decor
Customization is key, as not all walls are the same. I use adjustable shelf pins to change heights with the seasons. For a spring update, line shelves with removable floral wallpaper or hand-painted patterns.
Here’s a quick guide to affordable shelving solutions based on your style:
| Style | Materials | Cost Range | Skill Level |
|---|---|---|---|
| Bohemian | Macramé hangers + floating wood | $20-$50 | Beginner |
| Minimalist | Acrylic sheets + hidden brackets | $40-$80 | Intermediate |
| Vintage | Repurposed ladders + pipe fittings | $15-$60 | Beginner |
My trick? Stencil geometric designs onto shelves with acrylic paint. It’s removable, so you can change patterns with the seasons. For renters, tension rod shelves between walls offer zero-commitment storage. They’re perfect for displaying spring botanicals.
Highlighting Personal Items on Shelves
Mixing old treasures with new pieces adds heart to simple spaces. Open shelving is most interesting when it shows your personality and taste. The secret is in choosing items carefully, so they stand out without looking messy.

Curating Meaningful Collections
Begin by picking items that make you happy or have a story. In my kitchen, I mix my grandma’s pottery with modern vases. This mix of old and new is key to a great display.
- Group similar textures (like matte finishes or woven materials)
- Use odd-numbered arrangements for visual balance
- Rotate seasonal pieces to keep displays fresh
One client’s vintage teacups became a stunning centerpiece when paired with modern bookends. This shows how creative storage solutions can also be beautiful.
Balancing Personal Touches with Aesthetics
I follow the 60/40 rule: 60% for decor, 40% for personal items. This keeps shelves tidy while showing what’s important. Here’s what to avoid:
- Overloading shelves with framed photos (choose 2-3 standout memories)
- Placing bulky keepsakes beside delicate decor
- Ignoring negative space between objects
Last spring, I helped a homeowner display their kids’ art pottery with a single flower. It created a minimalist home decor piece that felt personal yet simple.
Open Shelving in Different Rooms
Open shelving fits well in any room, but it’s used differently in kitchens and living areas. Kitchens need practical storage for daily use, while living rooms are for showing off. Let’s see how to set up shelving in each space.
Kitchen Shelving: Culinary Inspirations
In kitchens, open shelves must be as useful as they look. I focus on zone-based organization near busy spots like stoves. This includes spice racks, olive oil bottles, and often-used utensils. Matte black brackets add a modern touch to wood shelves, avoiding the usual farmhouse look.
Here’s a simple way to keep your kitchen organized:
- Store everyday items at eye level
- Use uniform jars for dry goods
- Save upper shelves for decorative items
For modern kitchen design ideas, mix materials like tempered glass shelves with metal brackets. This mix adds interest while keeping the space open.
Living Room Styles: Cozy and Inviting
Living room shelves should feel relaxing, not perfect. I arrange books at angles, display art pieces, and leave space between items. Built-in shelves look better with textured baskets and plants that soften their edges.
To get that rustic shelving inspiration without being too obvious:
- Combine reclaimed wood with matte finishes
- Highlight handmade ceramics
- Add warmth with woven textiles
| Room | Key Focus | Materials | Styling Tip |
|---|---|---|---|
| Kitchen | Functionality | Stainless steel, sealed wood | Group items by use frequency |
| Living Room | Atmosphere | Reclaimed wood, mixed metals | Leave 30% negative space |
Whether updating your kitchen or creating a cozy lounge, remember that stylish open shelving ideas balance looks and use. The best designs evolve naturally. Start with the basics, then add your personal touch.
Open Shelving vs. Closed Cabinets
Choosing between open shelving and closed storage depends on your lifestyle and design preferences. Open shelves make spaces look airy and engaging. Cabinets are better for those who like to keep things hidden. Let’s look at how these options work in real life.

Weighing the Pros and Cons
Open shelving needs more dusting, which is true in kitchens where grease builds up. But, it’s great for quick access to items. You can easily find spices or plates without digging through drawers. On the other hand, closed cabinets hide clutter but can also hide expired items.
| Feature | Open Shelving | Closed Cabinets |
|---|---|---|
| Visual Appeal | High (displays decor) | Low (hidden storage) |
| Maintenance | Daily dusting | Monthly wipe-downs |
| Child Safety | Risky for breakables | Secure with locks |
In bathrooms, open shelves near showers are tempting but can warp wood due to humidity. We switched to acrylic cabinets that are moisture-resistant. This was a smart creative storage solution that kept the space looking modern.
When to Choose Open Shelving
I suggest open shelving in these cases:
- Small kitchens needing visual depth
- Spaces where you want to highlight collectibles or art
- Combined with closed storage (hybrid layouts)
For families with young kids, I designed a kitchen with upper open shelves for adults and lower locked cabinets for cleaning supplies. This kitchen organization tip balances safety with easy access. Just remember, open shelving works best when you curate what’s displayed, not just store it.
Maintenance Tips for Open Shelving
Keeping your open shelves looking great is easy. With a few smart tips, you can keep them beautiful and functional. Let’s explore simple ways to protect and refresh your shelves all year.
Keeping Your Shelves Dust-Free
My top tip is a microfiber glove. It catches dust without spreading it. For wooden shelves, I use a mix of white vinegar and water. This affordable shelving solution cleans softly and gets rid of smells.
“Dusting should be quick and quiet – like a ninja for your decor!”
Here’s a comparison of cleaning methods I’ve tested:
| Method | Materials | Frequency |
|---|---|---|
| Glove Dusting | Microfiber glove | Weekly |
| Deep Clean | Vinegar solution | Monthly |
| Light Maintenance | Feather duster | Every 3 days |
Seasonal Refresh: When and How
I update my shelves in March and September. It’s the perfect time to switch out winter items for spring ones. Try these DIY shelving project ideas during your updates:
- Paint thrifted bookends with pastel chalk paint
- Line shelves with removable floral contact paper
- Create mini plant stands from wooden crates
When I refresh, I ask if an item brings joy or just dust. If it’s the latter, it goes away. Remember, open shelving is all about choosing what you love, not clutter.
Upcoming Trends in Open Shelving for Spring
Spring brings new ideas for open shelving, mixing usefulness with style. This year, we see more focus on green materials and creative layouts. Kitchens and living rooms are getting designs that are both cozy and useful.
Popular Materials for Open Shelving
Bamboo shelves are becoming popular for being eco-friendly and strong. They’re great for modern kitchens. Reclaimed wood is also trending, adding texture and keeping things green. Brands like Pottery Barn and West Elm now mix materials, combining metal with natural finishes.
Innovative Designs to Watch Out For
Curved shelves make rooms feel more open and flowing. LED lights on shelves add a modern touch and keep things tidy. Asymmetrical designs are also in, making displays feel lively. Try using different heights for floating shelves to achieve this look.
While simple styles are popular, don’t be afraid to add bold contrasts. Mix smooth marble with rough baskets for a fun feel. Share your favorite open shelving ideas in the comments!